Showing posts with label hike. Show all posts

Tuesday, June 9, 2015

Makawao Forest Reserve Hike (and Bike)


Let’s say you want to go on a hike but not deal with the danger presented by lava fields, streams, waterfalls or cliffs. Nor do you want to be brutalized by the Hawaiian sun while you enjoy yourself. Hikers rejoice; the Makawao Forest Reserve trail (Kahakapao Recreational area) is for you!

Not to be confused with a MUCH shorter Waihou Spring trail a little bit to the west, the Kahakapao Recreational area in the Makawao Forest 
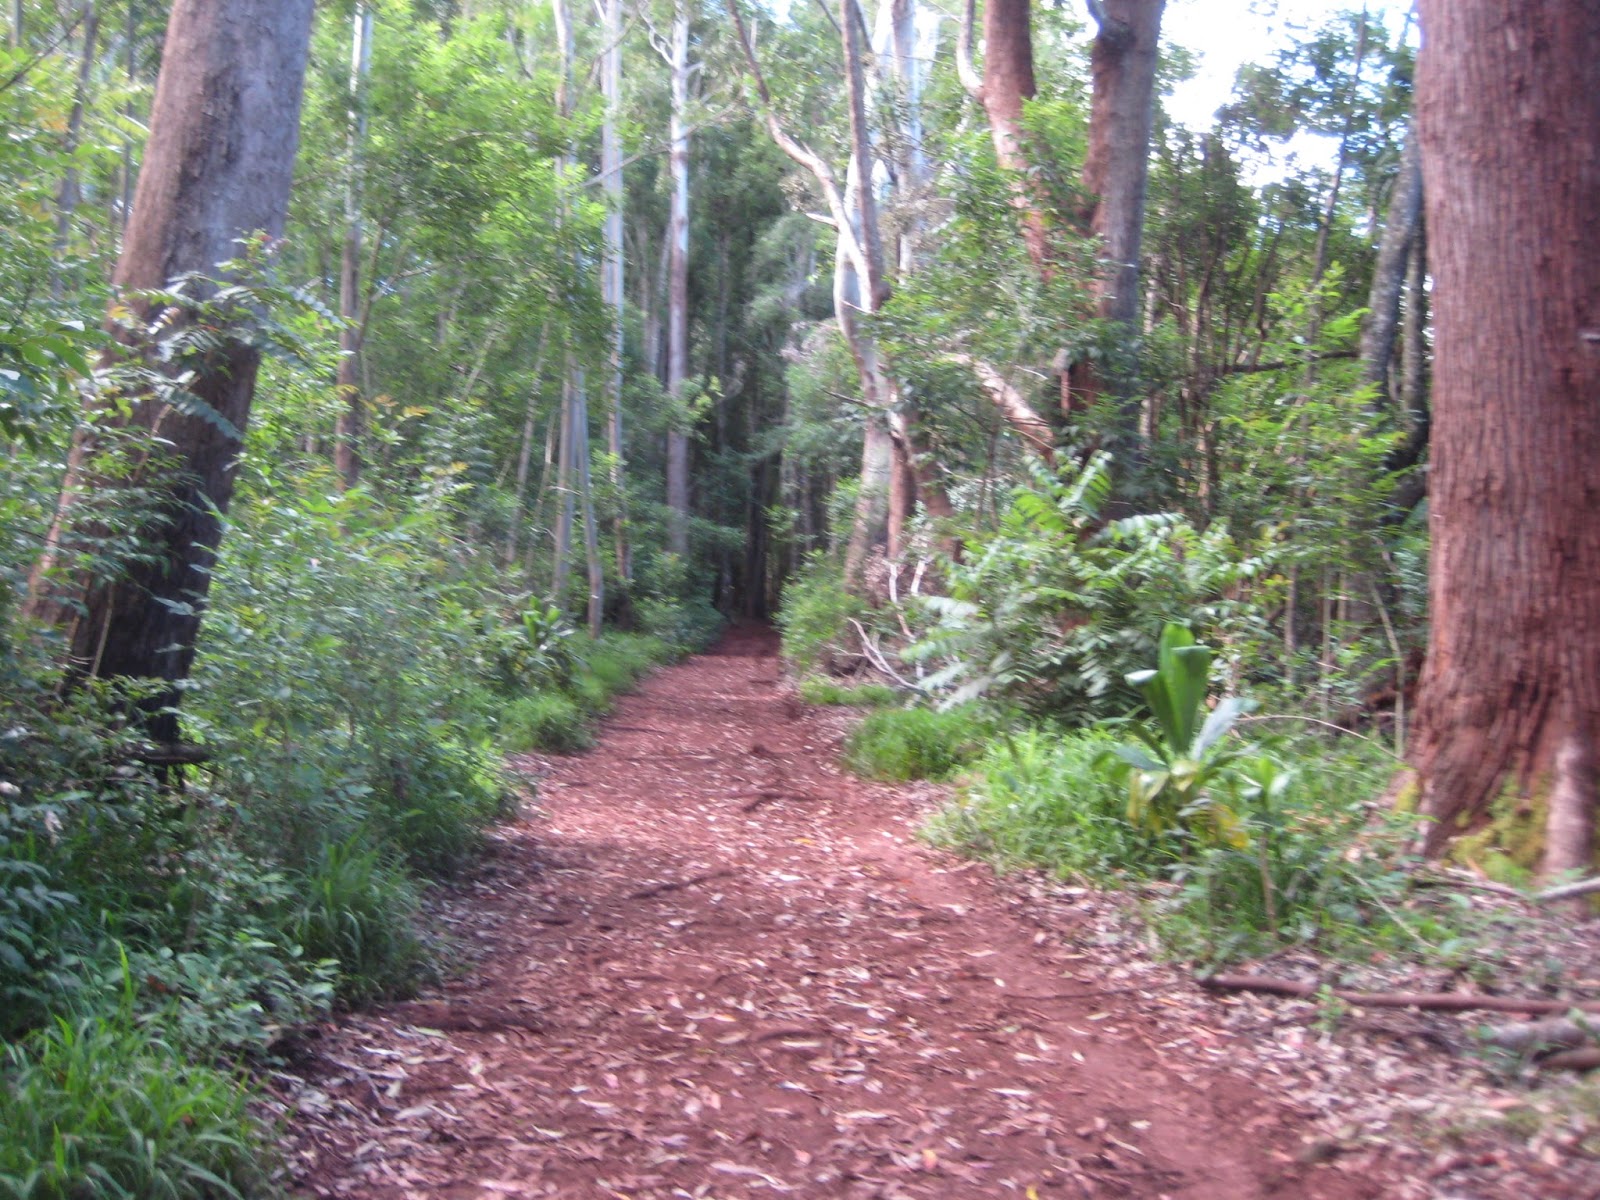
provides what amounts to a non-technical 6.2 mile walk in the woods through slightly varying terrain that rarely exceeds a 10 degree incline. This isn’t a particularly exciting trail visually speaking; it’s simple forestry with no views of the ocean as you can see from my pictures. (This is probably why it took me a while to get around to this hike.) Since this area is upcountry, it is definitely cooler than the coastal region and as such is prone to more rain. So, there is the occasional bit of mud to whet your whistle if you’re into that sort of thing. For the casual hiker, this is probably your best bet on Maui.

The trail is a loop trail with bike trails that for the most part parallel it (they occasionally cross paths.)
Haole in a tree.
Since the eastern/clockwise part of the loop is a little less steep – not that 7-10 percent incline is steep – my wife and I elected to go this route. Upon concluding the trail, I also felt that this side of the loop is a little more scenic and quieter as well, as some houses can be found across a ravine on the western portion of the trail.

While you may certainly hike, be aware that this is trail is equally well-known for its mountain biking, so watch out for downhill racers who aren’t on the specifically designated bike trails. While we didn’t see any more bikers than we did hikers, the bikers don’t always bother with the bike bells offered at the trail head so keep your eyes and ears peeled. Besides straight and speedy down-hills for bikers to enjoy, they also have a children’s and novice warm-up areas and ramps and such for more advanced bikers to enjoy.

Overall, this trail is relaxed in its meandering with the wonderful scent of eucalyptus trees in the air. Personally, I will be headed back to this trail but with my bike so I can add at least a small element of danger. Either hiking or biking, this is a quaint little place.  

Directions: From Paia, take Baldwin Ave. up the mountain into Makawao. At the first major crossroad in Makawao, hang a left onto Makawao Ave (where there’s a Mexican restaurant across the street on the corner). Travel east, and take the right immediately after the cemetery – this is Piiholo Rd. When you see a gated park on your right there is a fork that goes to the left; take this left fork. Follow this windy road until you have to make a right onto Kahakapao Rd. Keep going until you go through the yellow gates and you will soon make a right into a gravel parking lot.

For a map of what I am talking about, click HERE.

For a map of the trail, click HERE
Biker getting warmed up.


More advanced biker warm-up area.

Tuesday, February 24, 2015

13 Crossings Trail Maui


Park here.
Go there.
13 Crossings, how do I love thee? Let me count the ways…Actually, while I would say 13 Crossings aka Makamakaole Trail is nice, it isn’t any more interesting than some of the other ‘wet’ hikes around Maui. In fact, if you do like ‘wet’ hikes, the kind of hike you’re going to get wet on, then 13 Crossings is about as easy as they come. (At least until the very end when you have to climb up one waterfall to get to the next. And even then you can climb more ropes and apparently go on and on and on…) The easiness of this trail – 3 miles out and back – makes it less interesting than some other hikes, particularly the wet hikes found along the Road to Hana which often offer ocean views. 13 Crossings offers no such view and the waterfall scenery is tame for a fellow such as myself coming from Oregon. The waterfalls are nice, sure, but that’s all they are. Nice. The pools of water up this way are cool, which is a nice respite from the easy bake oven that is Kihei so it’s not like this hike is without its plusses. Oh, and the trail does have a section of small bamboo forestry which, you guess it, is nice. If there is anything else to note, it’s worth mentioning that if you come to a large boulder
Nice.
forking the stream into left and right paths, go right. You can still go left and you will still be taken to a waterfall and swimming hole, but it’s not the one every other blogger talks about. Actually, it’s a little curious that no one else mentions this fact. Maybe they’ve got better trail instincts as I always seem to find myself going left when I should be going to the right. I’m sure that means something deeper than I am willing to think about.
Wrong waterfall.

Picturesque. That's why I took a picture.


Directions: Go about 1.5 miles past mile maker 6 on Hwy 340; mile marker 7 is MIA. Look for a hole in a fence on the mountain side of the road just before the road takes a sharp bend. Go through the hole and almost immediately begin your first stream crossing. 

Sunday, August 17, 2014

Commando Hike Maui, Sort Of


Disclaimer…I do not think just ol’ anyone is capable of doing this hike. The potential for a serious mishap is high. You will slip, fall, cut, scrape, and/or bruise yourself. And the higher the water flow, the tougher the hike is. This hike requires balance, limber joints and upper body strength. If you are not adventure-minded, skip this hike altogether. There is a reason why this hike does not appear in any guidebook.

My buddy and I stopped at the gate just passed the mini-bamboo forest hike, about .25 miles passed the 6.5 mile marker on Hana Highway. We jumped the fence there and trudged up a path to the left, being careful not to agitate the very hefty cow lying in the shade (who would still be there hours later). Other reviewers say you have to pass a field of cows, but we only encountered the one. Then, at the top of the hill we could see a reservoir. We went down a slippery grassy slope to where we could meet a stream feeding into the reservoir. (Meaning, if you’re facing the reservoir, the stream will be towards the left side of it but not passed the gate that will be further on your left on the trail. I suppose you could go around the other side, but that would be a much longer walk.) And on up that stream we went.

Just another 7' high wall in the stream.
Very quickly we learned that neither my hiking shoes nor my buddy’s sneakers would grip the slippery rocks, basically forcing us to spider-walk much of the way upstream. Even as an experienced hiker myself, multiple time we caught ourselves saying, “Are you kidding me?” as we bruised our ankles against rock after rock. Navigating the stream took focus and it got a little bit old fast. I don’t remember how far upstream we got, but at an early point we encountered a fork in the stream. We decided to go left and it turned out to be the wrong way, so, go right at the fork. Of course, we didn’t know that at the time so we kept going upstream to the left, sometimes through 6 feet of water, never seeing the thicket of vines you’re supposed to encounter and wondering when the hell it was going to be over. Eventually we came upon an access road and man-made drainage ditch at that point we knew we were way off course.

Thinking we were screwed, we wandered the access road going downhill, figuring we’d try again some other day. Somehow, we turned left at Albuquerque and stumbled upon the exit of the cave portion of the Commando Hike! We couldn’t believe it. We checked out the
Going DOWN to the cave entrance.
surroundings and our way out was either down a 70 foot cliff or back through the cave, basically doing the Commando Hike in reverse. (A third option would have been to continue down the access road, but we hadn’t thought of that yet.) Since I wasn’t jumping off the cliff we went into the cave and made our way towards where the entrance is supposed to be. I have to say this part of the hike was really fun until we saw the part of the entrance where you shimmy up the 10 foot waterfall and we both refused to go down this way. It just looked too tricky. So, it was back into the cave and out the way we were supposed to go. Again, fun, until my buddy said he was stuck between two rocks where there were no hand holes to lift himself up and out. Somehow he squirmed his way free and we continued up the cave. There is a 10 foot rock wall inside the cave to climb but it was pretty easy since the rocks were rough and easier to grab. (Well, my buddy did slice a finger open on a jagged rock.) Oh, and you will need headlamps for this bit as it is really dark in the cave.

Once we came out the other side, we were quite proud of ourselves. Not only did we go a much longer way upstream than we should have, but we did the cave portion of the Commando Hike down and up. Booyah! But we weren’t done yet. We turned left to a really sweet water hole with a small cliff to jump off. There was an option to grab a rope and climb the waterfall there, but the day was wearing on and we had no water or food with us. Stupid? Yes. We hadn’t planned to be out there so long but apparently shit happens. So after my buddy jumped off the cliff, we went back to the access road, backtracked a little bit, until we could keep heading downhill keeping the hike’s ravine to our left and the ocean in front of us. The car was a blessed sight. Flatbread Pizza Company here we come!


Our little adventure would have been better had we packed food and water in a dry-bag, but hey, there’s always next time. It may be a while but I’m sure we’re game for another go ‘round. Also remember to go right at the fork in the stream. You can thank me later with a brew. Cheers.


Thursday, August 7, 2014

Hiking on Maui

Haleakala National Park

Pick a trail, any trail! Due to its accessibility, visitors usually opt to hike Sliding Sands Trail which begins just around a small hilltop opposite the Visitor’s Center at Haleakala’s summit. As its name implies, this trail is mostly sand which is perfectly fine when hiking down to the horse hitch on the crater floor (3.9 miles according to the park’s map). Assuming you’re planning to go that far, keep in mind that if you plan to go out the same way, hiking in this volcanic sand is not nearly as much fun on the way back out. Since you’ve already seen stunning cinder cone after cinder cone on the way down, you’re going to need a little mental strength to get back out. Having strong legs will not hurt either. In that case, you may be an experienced hiker who wouldn’t mind continuing east past the horse hitch another 1.7 miles to Kapalaoa Cabin or even 5.6 miles to Paliku Cabin and campground. For the seriously hardcore hiker, you can hike the Pipiwai Trail from Paliku down the Kaupo Gap to the island’s desolate southeast end. There is also the option of hiking around some of the cinder cones and doubling back or hiking around the cones and heading out of the crater on Halemauu Trail. If you go that 5.7 mile route, you’ll need to park a car or hitchhike back to your car at the summit from the Halemauu Trailhead. Planning your hike in this particular manner allows you some expansive views of the crater. And, as the sun changes position during the day, dramatic color schemes will come to life you may not have seen from other areas in the volcano. Depending on your route(s), elevation changes will be in the neighborhood of 1,600 to 3,000 feet. Other things to note: The crater receives little rainfall which makes for a fragile ecosystem. There isn’t much life up here but what little there is doesn’t need to be run over by visitors going off trail. Please respect the unique and indigenous Silver Sword bushes and please do not feed the Nene geese that live here. Bring sunscreen, a warm jacket so you can dress in layers, a poncho, and a hat. You’re closer to the sun up here; even if it is cold and cloudy you can still get a sunburn. Speaking of cold, it can be as cold as 32 degrees up at the summit depending on the time of year. Of course, if you are hiking, you may get warm, hence the advisory to dress in layers. It can also rain at any moment at the summit, so be prepared for that. Lastly, bring food and water as neither are served inside the park’s boundaries. Park entrance fees are currently $10 per passenger vehicle and $5 per bicyclist.
Nene birds. Please do not feed them.

Lahaina Pali Pali Trail

Or as I like to call it, the West Maui Windmill hike. If you’ve seen the windmills running up the West Maui mountain’s spine, you should know there is a trail that leads to the very middle of those windmills at an elevation of about 1600 feet. There are two ways to approach this hike, from either the Maalaea Harbor side or the Lahaina side of the West Maui mountain. Hiking from one side to the other will take you 5.5 miles, but the Lahaina side of the trail is considerably steeper if you’re beginning the hike from that end; something to be aware of. Myself, I usually only hike to the top and go back the way I came, which is usually from the Maalaea harbor side which still has decent elevation gains for its first mile or so. Either way you go, though, gives you wide angle shots of the southern and west ends of the island. The nearby islands of Lanai and Kahoolawe are also clearly visible from the windmills themselves. During whale season, this is a spectacular hike as you can spot whales puffing far and wide. (Bring binoculars if you want to actually see the whales if they breach.) Careful when hiking this trail during or after a rainfall; for some reason the rocks here are more slippery than usual, so I advise wearing dedicated hiking shoes. And, you’ll want to go early in the morning, preferably in the winter. Midday summer heat is brutal on this hike and there is very little shade to spare you the onslaught. This hike can also be very windy; that’s why the windmills are placed here, so be prepared for this as well. To get to the Maalaea side trailhead, the trailhead is .2 miles south-southwest of the junction of Honoapiilani Highway and Kihei Road. There is a gate there but you can open it and go through it (close the gate behind you) and drive up the gravel road to a small, six-car parking lot. The Lahaina side trailhead is .25 miles past (or before depending upon which way you are driving) the Pali tunnel on Honoapiilani Highway.
Location of the Lahaina side trail head. Note the tunnel.
Location of the Nailiili Trail. Note the hairpin turn.
Location of the Nailiili Trail. Note the hairpin turn

Nailiili Stream and Waterfall Hike

You may have heard of the Pipiwai Trail/Bamboo Forest Hike that is just past Hana and granted it is a nice easy hike that takes you to a stunning bamboo forest. If you’re the more adventurous type like myself and don’t want to go all the way to Hana to see some bamboo, try this hike which is on the way to Hana. You’ll be treated to four waterfalls, but you’re going to have to work for it. To begin with you have to go .7 miles past the 6 mile marker on the road to Hana and park on the side of the road. Basically, park where you see all the other cars once you make a hairpin turn around a stone wall where it becomes one lane (don’t worry, it goes back to two lanes eventually). Once parked, go into one of the spur trails in the bamboo groves and follow the sound of the water. This will bring you first to a foot and a half stream you have to cross and then to a small waterfall area about twenty feet wide that you have to cross. On the other side of the bank, you will see a fallen tree. To the left of the fallen tree is the main trail that runs along the stream (do not go into the bamboo off-shoot trails unless you like bamboo; these trails go nowhere). Follow the trail upstream. You may soon see a raging waterfall to your left, but this is a diversion waterfall from too much rain in the area. Most of the time it is dry and you may not even see it trickling. When you follow the trail to a nice swimming hole with a twenty foot high waterfall, this is considered waterfall #1. To the left of this fall is a slippery rock face with a rope to help pull yourself up fifteen feet to where the trail continues. Not a particularly difficult stunt, but you are taking your chances nonetheless. Further on is the second waterfall which has a very rickety ladder and suspect rope which you must climb about twelve feet up to continue the trail (the ladder is to the left of the waterfall). From here, it’s approximately another fifteen to twenty minutes until the trail runs out when it hits a large pond with a waterfall (#3) on its far side. Here’s where the fun really begins: If you swim across the pond to the waterfall and climb up its ten-foot face, there is another waterfall a minute or so away. As this waterfall (#4) is the biggest at about 35 feet high, it is the best. Combined with its wading hole, it’s worth the effort to get here. Most visitors never get this far on this trail which is really a shame. Allegedly there is another waterfall beyond this one, but you’d be crazy to try and scale this waterfall. You have been warned. Final note, take bug spray as the mosquitoes here can be merciless. Also be aware that all Maui streams are prone to flash floods. Check local weather reports for recent rainfall before going. This is a short hike, about forty-five minutes to the last waterfall, but it is challenging for its length.